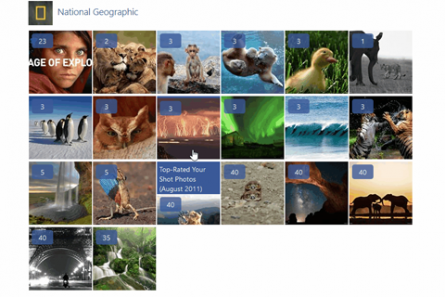

FB album browser is one of those plugins that let us use the power of 3rd party integration with minimal programming knowledge.
It is written using jQuery by Dejan Stojanovic. It makes it possible for a user to integrate their Facebook photos and albums within the website using the plugin.
FB album browser is very flexible, and there is an option to adjust settings to your specific needs. Most of those settings are for appearance and presentation of data fetched from Facebook. The plugin has callback functions which can be very useful in data manipulation. To name a few, there is a callback that is activated when an image is selected and it provides all the information needed to download that specific image. There is a callback for when an album is chosen, and you can use it for downloading all images from that photo album.
One of the great features of Drupal 8 (well, Drupal in general) is that you can easily extend its core and code with 3rd party libraries. Because of that, the FB album browser and Drupal are a great match.
In this tutorial, you will learn how to integrate these two libraries.
After you`ve downloaded the FB album browser (https://github.com/dejanstojanovic/Facebook-Album-Browser), in the archive you'll find the main files and some example files. Everything that is needed for this plugin to work is in the src/ folder. There you can find the main JS file, main CSS file, and few image files that are used for the plugin to look modern.
It’s a good idea to create a separate JavaScript config file that will store configuration data about the plugin. If you later update the core of the plugin, there won't be a need to set up the configuration once more, because it will be in a safe place.
So, step zero is to create fb-album-browser-config.js.
In that file, insert the following code:
FB.init({
    appId      : 'Your app facebook id',
    cookie     : true,
    xfbml      : true,
    version    : 'API version'
  });

  FB.AppEvents.logPageView();

  FB.getLoginStatus(function(res) {
    if( res.status == "connected" ) {
      var user_id = res.authResponse.userID,
          user_access_token = res.authResponse.accessToken;
          user.id = user_id;
      // Parameter for settings of the Facebook photo brower plugin.
      jQuery(".fb-album-container").FacebookAlbumBrowser({
        // Parameter for settings of the Facebook photo brower plugin.
      });
    }
  });
The first part (FB.init) initializes the Facebook JS SDK (find out more about it here: https://developers.facebook.com/docs/javascript).
After that, FB.getLoginStatus checks whether the user is logged in with their Facebook credentials, and if that is true, the FB album browser will be initialized.
FB-album-container class in the jQuery selector identifies the element to which the instance would be attached.
The first step is to add the plugin’s JavaScript and CSS file into the theme's library's YAML file. At the end of the file, add the following code (because this is a YAML file, be careful with blank spaces):
fb-album-browser:
  css:
    theme:
      stylesheets/jquery.fb.albumbrowser.css: {}
  js:
    js/jquery.fb.albumbrowser.js: {}
    js/fb-album-browser-config.js: {}
The order of JS files, in this case, is important, so the config file needs to be called after fb.album.browser. So far, we have created the configuration file for the plugin, added all files need to the .yaml file.
The next step is to call the library theme on the Website's gallery page. This is done by adding this code ({{ attach_library('THEMENAME/fb-album-browser') }}) at, preferably, the end of a twig template file. The following code shows our gallery twig template with an added call to the theme in the last row:
<body>
<!- - html code of the template page - ->
{{ attach_library('THEMENAME/fb-album-browser') }}
</body>
Slobodan Prodanović
